
ARC Raiders Walkthrough: A Dead End Mission Made Easy
A Dead End is one of the most intense underground missions in ARC Raiders, combining PvE pressure, PvP risk, and objective-based puzzle mechanics. While the quest itself isn’t mechanically complex, the Security Wing’s high-traffic location and ARC density can make it punishing for unprepared raiders.
This walkthrough explains exactly how to complete A Dead End efficiently and safely-whether you’re running solo or coordinating with a squad.
Preparation Tips Before Heading to Blue Gate
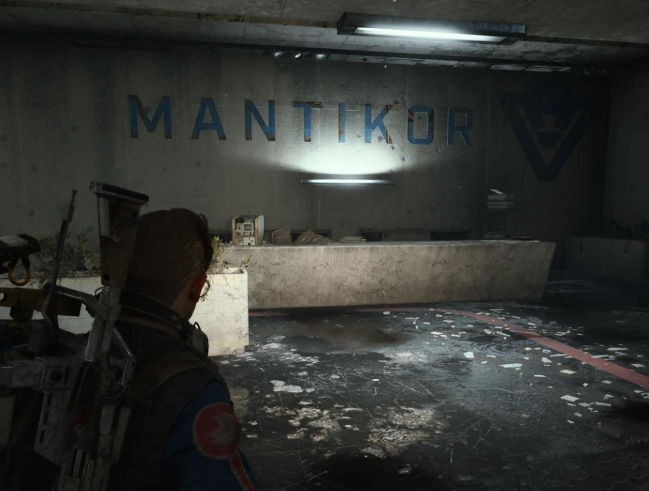
Your main objective area is the Security Wing, located within MANTIKOR’s underground complex. This zone is heavily guarded by ARCs and frequently contested by other players.
Before deploying, make sure you:
·Equip an augment with a safe pocket (mandatory for quest completion)
·Bring mobility tools and healing ARC Raiders Items
·Consider teaming up (battery objectives are risky solo)
·Clear inventory space for potential loot
While this mission doesn’t require advanced mechanics, poor preparation can easily lead to losing critical quest progress.
Step 1: Find MANTIKOR’s Underground Facilities
MANTIKOR’s underground entrances are located between:
·Checkpoint
·Reinforced Reception
·Warehouse Complex
As you approach these areas, look for “Entrance” icons on your map.
Best Entrance to Use
The entrance closest to the Cliffside Airshaft is strongly recommended.
Here’s why:
·It provides the shortest route to the Security Wing
·It keeps you near a reliable extraction path
·It reduces exposure to high-traffic surface zones
Once underground, move carefully. Corridors funnel players into tight choke points where ARCs or rival raiders can ambush you.
Step 2: Enter the Security Wing and Locate the Locked Door
Inside the underground complex, navigate toward the Security Wing.
In the southern corner, you’ll find:
·A large locked door
·A nearby battery console
This is the core puzzle element of the quest.
To unlock the door, you must locate three carryable batteries and install them in the console.
Step 3: Locate and Install Three Batteries
The batteries spawn at another console somewhere within the Security Wing. Their exact locations are randomized each run.
This means:
·You’ll need to explore multiple rooms
·Each battery must be carried individually
·You cannot defend yourself while carrying one
If playing solo, this requires three separate trips, making it one of the riskiest parts of the mission.
Solo vs. Squad Strategy
Solo Players
·Clear surrounding rooms before grabbing a battery
·Move slowly and listen for footsteps
·Avoid sprinting unless necessary
You’ll want strong mid-range weapons and defensive ARC Raiders Items to handle unexpected ARC patrols.
Squad Players
·Assign one player as the battery carrier
·Teammates provide overwatch and suppress threats
·Communicate clearly after each battery placement
Squad coordination dramatically lowers mission risk, especially in contested underground zones.
Step 4: Enter the Locked Room and Trigger the Recording
After installing all three batteries:
·The large door will unlock
·Enter the newly opened room
Inside, you’ll see a large projection screen. To its right is an interactable machine.
Activate the device.
A recording begins, revealing new information about Project Heartwood and updating your objective.
Your next task: locate the Dusty Film Reel.
Step 5: Find the Dusty Film Reel
The Dusty Film Reel is located:
·Inside a container
·To the left of the large projection screen
Search the container and collect the reel immediately.
Then:
·Place it into your safe pocket
This step is absolutely critical. If you die before extraction without securing it, you’ll lose the item and must repeat the entire mission.
Players who regularly buy ARC Raiders Blueprints to accelerate crafting progression already understand the importance of protecting valuable assets. The same principle applies here: always safeguard quest-critical items.
Step 6: Extract Safely via the Airshaft
With the Dusty Film Reel secured, you have two choices:
1. Extract immediately
2. Continue looting the Security Wing
Looting can reward valuable ARC Raiders Items, including crafting materials and gear upgrades. However, greed often leads to mission failure.
The safest route is to head toward the nearest Airshaft extraction point, ideally the Cliffside Airshaft if that was your entry path.
Extraction Tips
·Move slowly and avoid unnecessary fights
·Don’t engage in PvP unless unavoidable
·Use mobility tools to reposition quickly
Successfully extracting with the Dusty Film Reel completes A Dead End.
Why A Dead End Matters for Progression
This mission expands the narrative surrounding Project Heartwood and MANTIKOR’s underground operations. More importantly, it opens up additional progression and crafting opportunities.
Blueprints and crafting are central to long-term optimization in ARC Raiders. While some players choose to buy ARC Raiders Blueprints through trading systems to speed up loadout progression, narrative quests like A Dead End provide organic unlocks tied to exploration and survival skills.
In short:
Questing fuels crafting. Crafting fuels power. Power fuels survival.
Key Takeaways for A Dead End
·Equip a safe pocket augment before deployment
·Use the entrance closest to Cliffside Airshaft
·Expect randomized battery spawn locations
·Install three batteries to unlock the Security Wing door
·Retrieve and secure the Dusty Film Reel immediately
·Extract safely to complete the mission
Final Thoughts
A Dead End may sound discouraging, but it’s a crucial stepping stone in ARC Raiders’ progression. The mission blends underground navigation, light puzzle-solving, and high-risk extraction gameplay, core pillars of the game’s design.
With proper preparation, reliable ARC Raiders Items, and smart battery management, the mission becomes manageable even for solo players. Whether you prefer to grind your progression naturally or buy ARC Raider Blueprints to optimize your gear path, mastering quests like this ensures you stay ahead in both narrative and competitive advancement.